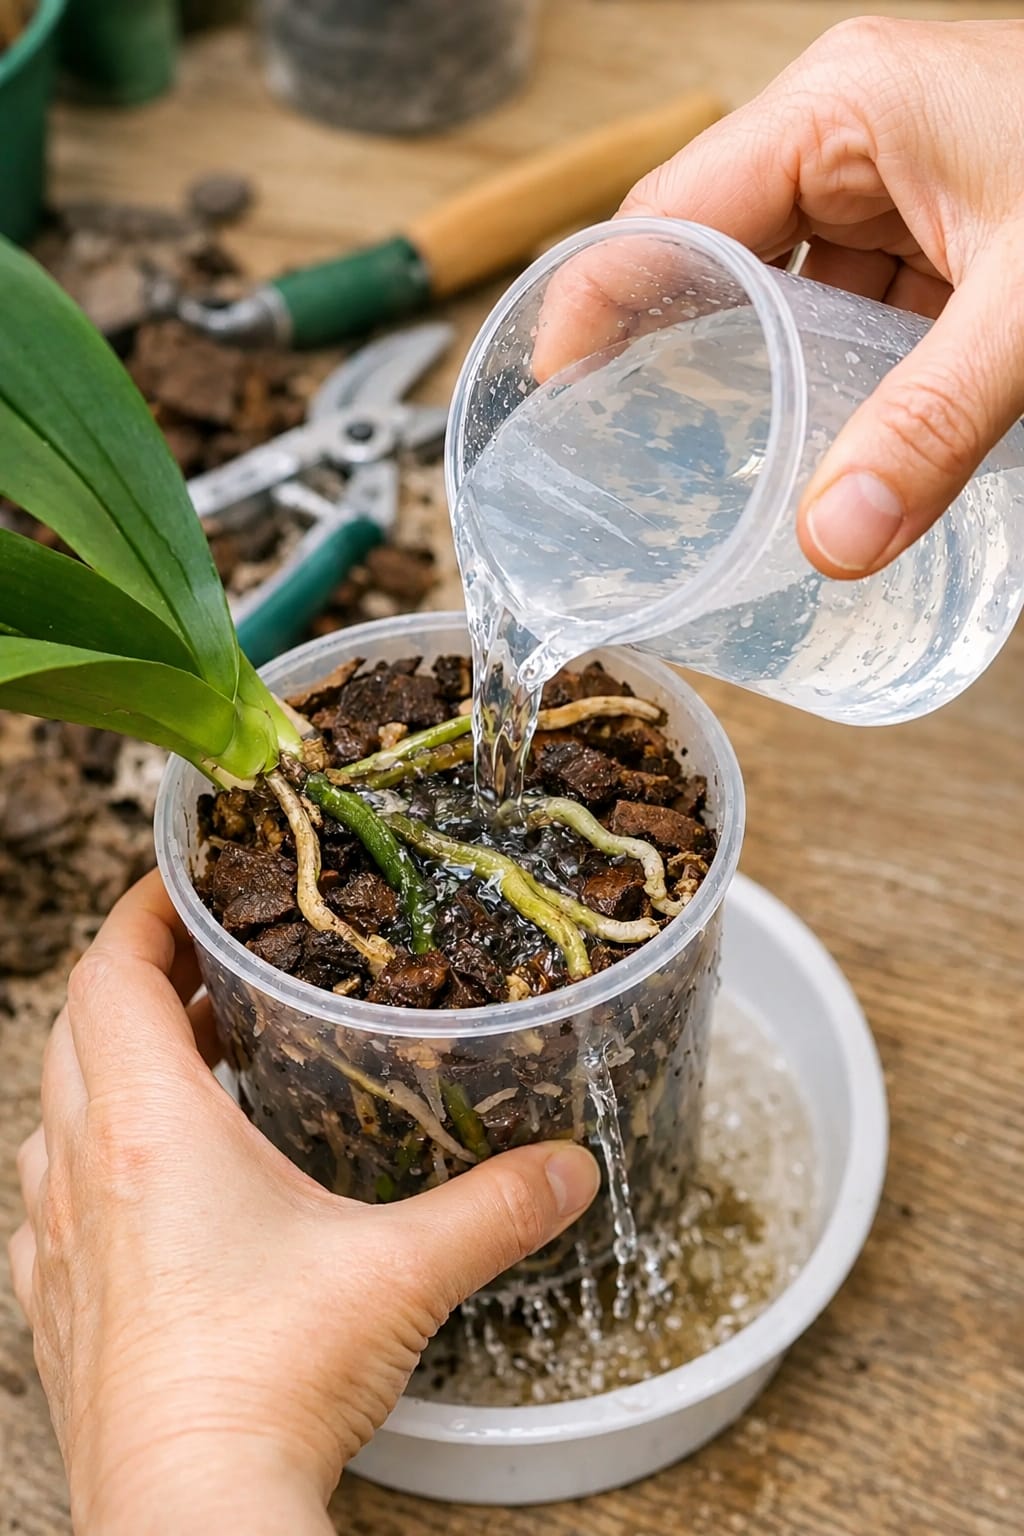
Orchids look elegant and delicate, but their care can be wonderfully simple once you understand their roots. A healthy orchid often has firm roots in shades of green, silver, and cream, growing through a chunky bark mix instead of ordinary soil.
One of the easiest ways to keep an orchid looking fresh is a simple flush-and-drain watering routine. This method gives the bark and roots a full drink, refreshes the potting mix, and lets excess water flow freely from the pot.
It takes only a few minutes, yet it can make orchid care feel much easier and more consistent.
Why Orchid Roots Matter So Much
Orchid roots are different from the roots of many common houseplants. They enjoy air, light, and a loose growing medium. This is why many orchids are sold in clear plastic pots with drainage holes.
The clear pot lets you see what is happening below the surface. Green roots usually mean the orchid has recently been watered, while silvery roots often show that the bark has dried and the plant is ready for another drink.
When the roots look fresh and full, the entire orchid looks more vibrant. Healthy roots support strong leaves, new growth, and beautiful flower spikes.
What Is the Flush-and-Drain Method?
The flush-and-drain method means pouring room-temperature water slowly through the orchid bark, allowing it to soak the roots, then letting all extra water drain away.
It is simple, clean, and easy to repeat. Rather than giving the orchid only a small splash, you water the entire root area evenly. The bark absorbs what it needs, and the pot drains naturally.
This routine works especially well for Phalaenopsis orchids, which are among the most popular orchids kept indoors.
What You Need
- An orchid in a pot with drainage holes
- Room-temperature water
- A bowl, sink, or tray to catch the water
- A small cup, watering can, or jug
- A soft cloth for wiping the pot and leaves
A clear inner orchid pot is especially helpful because you can see the roots and notice when the bark has dried.
How to Water an Orchid with the Flush-and-Drain Routine
Place the orchid pot in a sink, large bowl, or shallow tray. This gives excess water a place to collect while you water the plant.
Fill a cup or small watering can with room-temperature water. Pour slowly over the bark around the roots, moving around the pot so the entire growing mix receives moisture.
Continue until water begins to run freely through the drainage holes. Let the pot sit for a few minutes so the bark and roots have time to absorb moisture.
Once the water has finished draining, lift the pot and allow any remaining drops to flow out. Wipe the outside of the pot if needed, then return the orchid to its decorative planter or display space.
The roots often look greener and brighter after watering, which makes this a satisfying routine to watch.
How Often to Use This Method
Most indoor orchids enjoy watering when the bark is nearly dry and the visible roots look silvery rather than bright green. Depending on your home, this may be about once a week.
Warm, bright rooms may dry the bark faster, while cooler rooms may take longer. The clear pot makes it easy to check the roots instead of following a strict calendar.
A consistent routine gives you the best results. Check the orchid every few days, then water when the bark and roots show that they are ready.
The Best Water for Orchids
Room-temperature water is a great choice for orchid care. Filtered water, rainwater, or tap water that has been left to stand can all work well for many homes.
The important part is watering evenly and letting the excess water drain from the pot. This keeps the bark mix refreshed and gives the roots a clean, thorough drink.
For an extra polished routine, use a clean cup or small watering can that makes it easy to direct the water around the edges of the pot.
Choosing the Right Potting Mix
Orchids need a loose, airy growing medium. A bark-based orchid mix is ideal because it creates spaces around the roots and allows water to move through the pot.
Over time, bark breaks down naturally. Refreshing the potting mix every year or two can help keep the orchid display looking neat and give the roots a fresh growing space.
Choose an orchid mix with bark pieces, perlite, charcoal, or moss, depending on the type of orchid and the growing conditions in your home.
Best Light for a Beautiful Orchid
Orchids look their best in bright, indirect light. A spot near an east-facing window or a bright room with filtered sunlight is often ideal.
Place the orchid where it can receive plenty of light without sitting in harsh direct sun. A table near a window, a kitchen shelf, or a bright bedroom corner can make a lovely display.
Orchids are especially beautiful when placed in simple ceramic planters, woven baskets, or clear glass containers that show off their elegant leaves and roots.
Keep the Leaves Looking Fresh
Large glossy orchid leaves can collect dust over time. Wipe them gently with a soft damp cloth every few weeks to keep their natural shine visible.
Clean leaves make the whole plant look more polished and help it become a beautiful part of your home décor. Use this time to look at the roots, check the bark, and enjoy any new growth.
A clean pot, fresh bark, and tidy leaves can make even a small orchid feel like a luxury plant display.
Supporting New Growth and Blooms
Orchids respond beautifully to stable care. Bright indirect light, a consistent watering routine, and an airy bark mix help create the conditions for new leaves, roots, and flower spikes.
During the active growing season, use a balanced orchid fertilizer mixed according to its label instructions. Apply it after watering as part of your regular care routine.
Patience is part of growing orchids. The plant may take time between flowering cycles, but a well-cared-for orchid can reward you with beautiful blooms again and again.
Where an Orchid Looks Best in Your Home
Orchids bring a calm, elegant touch to many spaces. Place one on a dining table, kitchen counter, office desk, bedroom dresser, or bathroom shelf with natural light.
White, purple, pink, and yellow orchid blooms look beautiful against neutral walls, natural wood, and simple pottery. A group of two or three orchids in matching pots can create a lovely hotel-style display.
Even when the orchid is not blooming, its broad green leaves and visible roots add a clean, modern feeling to a room.
Frequently Asked Questions
Should I water an orchid with ice cubes?
Room-temperature water poured through the bark gives you more control and helps you see when the pot has drained fully. The flush-and-drain method is an easy routine to repeat.
Why are orchid roots green after watering?
Orchid roots often become green after they absorb moisture. This is a natural sign that the roots have had a good drink.
Can I use a decorative pot without drainage holes?
Yes, as long as the orchid stays in its clear plastic inner pot with drainage holes. Water the inner pot separately, let it drain, then place it back inside the decorative pot.
When should I repot my orchid?
Repot when the bark mix looks broken down, when the orchid has outgrown its pot, or when you want to refresh the growing medium. A new bark mix gives the roots a clean, airy home.
How can I encourage an orchid to bloom again?
Give it bright indirect light, steady watering, and regular orchid fertilizer during active growth. A consistent care routine helps support the plant through each new growing cycle.
Final Thoughts
The flush-and-drain routine is one of the easiest ways to care for an orchid and keep its roots looking fresh. By watering the bark thoroughly, letting the pot drain, and checking the visible roots, you can build a simple routine that feels natural and rewarding.
With bright indirect light, clean leaves, an airy bark mix, and patient care, your orchid can remain a beautiful and elegant part of your home for years to come.